Contract monitoring
Purpose
The contract monitoring section is the programme users section. The programme user should have most of the needed features available here to be able to assess the Contracting phase and set the project to the status Contracted.
In terms of privilege this section is therefore always hidden for applicants and can be set to hide/view/edit for monitor users.
Change project status to contracted
As indicated above, a project can only be set to Contracted if the project is in status Approved. This means that, for example, on-going modifications first have to be closed before a project can be set to contracted.
A lock functionality is provided, per page, so that the programme user can lock sections, if wanted. Any user with access to the page is then forbidden to edit the page. If editing is needed the programme user can unlock the dedicated section by clicking the unlock icon on the top right corner of the page. Programme users must have edit right over contract monitoring to be able to lock and unlock.
The section Contracting is located in the side navigation on the same level as Application Form (see below).
The Contracting section is aimed to be used by programme users, the action to set a project to contracted can only be done once and cannot be reverted. When a project is set to contracted, the sections and fields remain editable.
The contract monitoring section is always hidden for applicants and can be set to hide/view/edit for monitor/programme users.
Change project status from contracted to Closed
Similar as to setting the status of the project to contracted, a project can only be set to closed from the status contracted onwards. This means that all modifications should have been closed. Once the project is closed anything is still possible in the project except for modifications. This is done so that, in case required, the project can still create reports after closure for indicators that require to do so.
In order to revoke rights for applicants on a closed project, the admin or programme user must set all users to view in the project privileges. Then users can no longer carry out any actions within the project.
In order to do modifications for closed projects, the project must first be set back to contracted.
Project start and end dates
In this section the project start date can be added by the user with edit right. The project end date is automatically proposed based on the project duration. If project duration is changed through a project modification, the end date shall automatically be adjusted. In V10 the Closure date was added, where the programme user can manually indicate the closure date of the project which can differ from the action to setting the project to Closed.
The programme user also has the possibility to add an entry into force date and to add subsidy contract amendment dates, both with internal comments. The last date of these fields shall show up in the contracts and agreements section, together with the start date - for more info, please see Contracts and agreements.

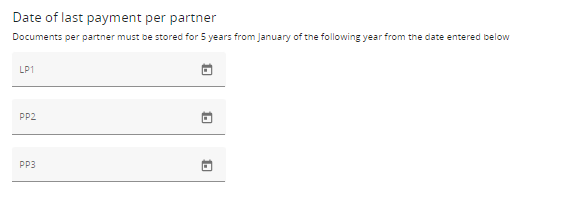
Date of last payment per partner
As part of the requirements in Common Provisions Regulation Annex XVII, the programme is obliged to record the data of the last payment per partner. This is needed for knowing when the retention period for keeping documents is starting. From the date entered the partners are obliged to keep all documents for 5 years starting from the first January after the date entered. These dates are only visible for the programme users with access to contract monitoring.
Specific Project typology
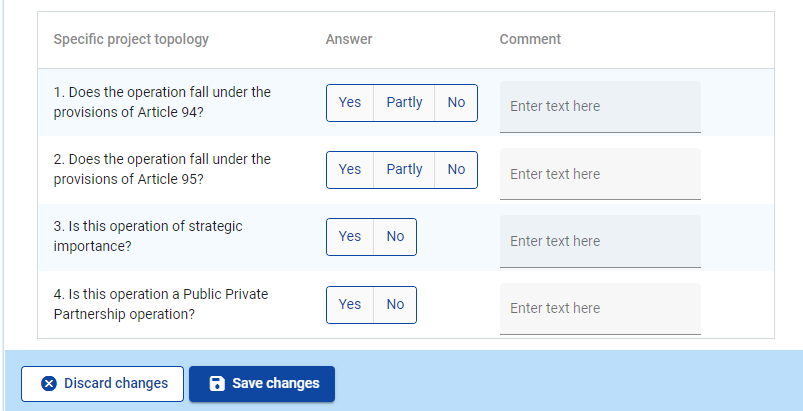
These 4 questions are in the contract monitoring section to help identify the project’s potential “special” character which should also be reported to the European Commission through SFC.
In the future, the answers to these questions shall also be added to the programme export so that projects falling under any of the below typologies can be filtered out.
Fast track lump sum
Fast track lump sums used in an approved application form show up in this contract monitoring page and can be set “Yes/No“ for ready to payment, whenever the conditions are met for it to move forward to payment. Programme user can also add a text comment, if necessary.
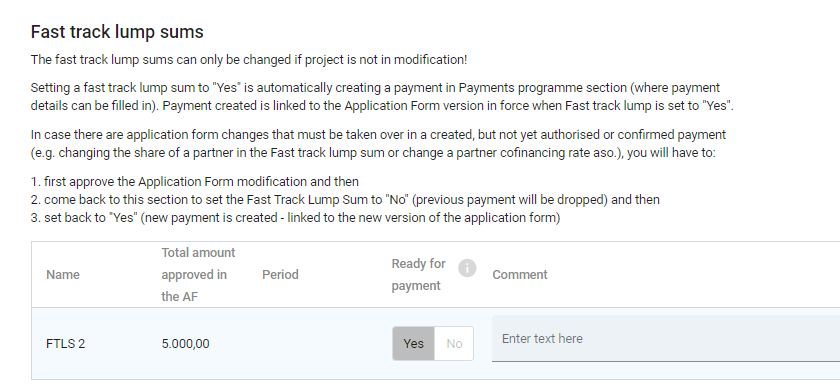
“Yes/No“ label can only be changed when the project is not in modification nor when the first payment related to the respective fast track lump sum is authorised in programme Payment section
Setting a fast track lump sum to “Yes“ is automatically creating a payment in programme Payments to projects and partner shares amount is displayed in Partner report Financial overview of next partner report created. Payment created is linked to the Application Form version in force when Fast track lump is set to “Yes”.
In case there are Application form changes that must be taken over in a created, but not yet authorised or confirmed payment (e.g. changing the share of a partner in the Fast track lump sum or change a partners cofinancing rate), user will have to come back to this section after application form modification is approved and set the Fast track lump sum to No (previous payment will be dropped) and then set it back to Yes (so that a new payment is created - linked to the new version of the application form).
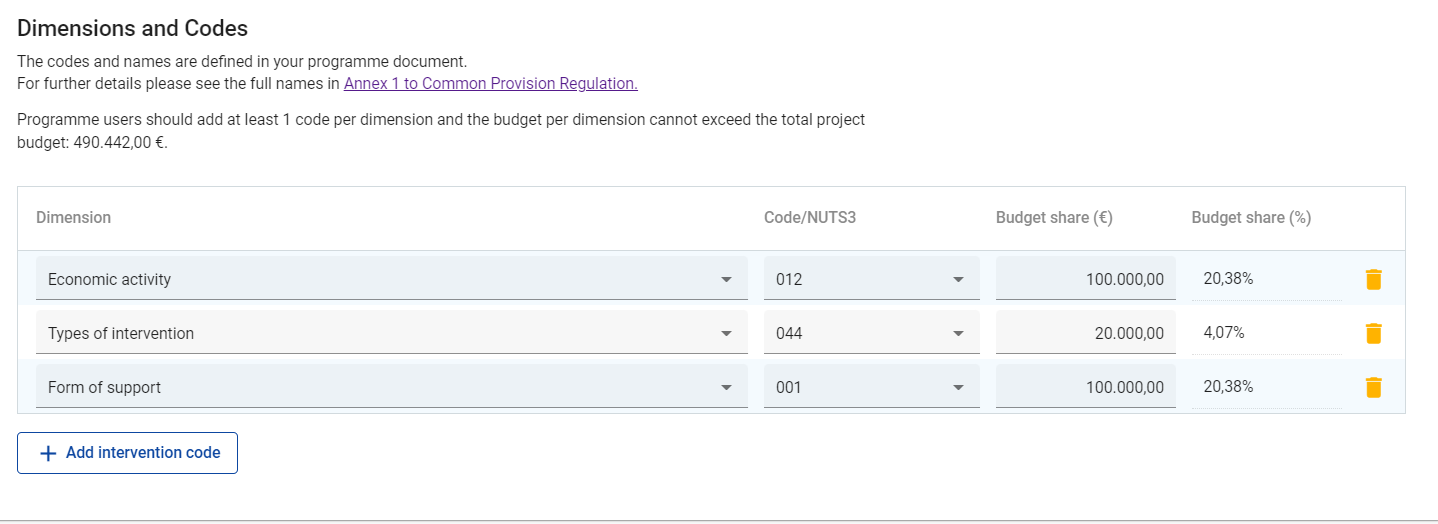
Dimensions and Codes
In this section the programme user is expected to assign to projects codes per dimensions as per Annex 1 of the CPR.
The programme is expected to assign at least 1 code to each dimension!
The combined codes per dimension should always cover 100% of the budget. So, if only one code of a dimension is chosen, 100% of the budget should be assigned to that code. If more than one code is assigned to a dimension, the budget can be split accordingly.
The codes are assigned per specific objective by the programme. Therefore, the choice of codes is dependent on the priority chosen by the project. For more information regarding setting up the codes as a programme, see: Priorities
For the location Dimension only the NUTS3 of the partner addresses can be selected.
In case more partners in the project have same NUTS, amounts should be summed up and filled in, as only 1 NUTS can be filled in for Location dimension.
Contracting checklists
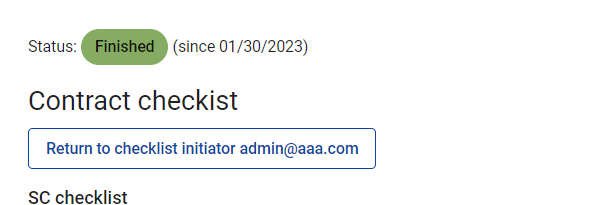
Checklists type Contracting (templates are created by programmes in https://jems-eu.atlassian.net/wiki/spaces/MS/pages/1831337985) can be created by programme user, can be filled in, downloaded and Finished.

User can edit/delete only own checklists while is status draft. Finished checklists can’t be deleted/edited, but can be reverted to status Draft (from which they can be further edited by initiator user)
Attachments
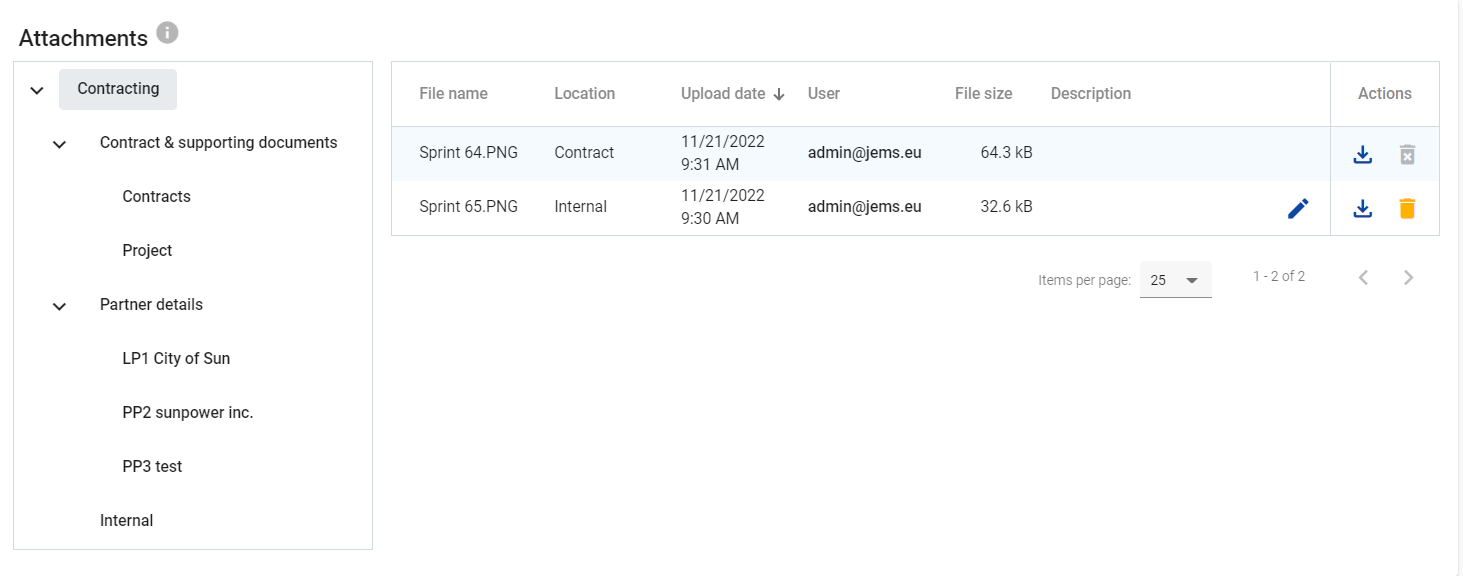
The most bottom section of the contract monitoring section is the Attachments section.
The programme user can access here in View mode all files from the entire contracting section.
The programme user can upload/delete files under the folder “Internal” - this is a section that is only visible and accessible to users that have access rights to the Contract monitoring section.
