Initial translation management
General purpose
The purpose of this document is to provide an overview of how to manage translations in Jems.
Location and access
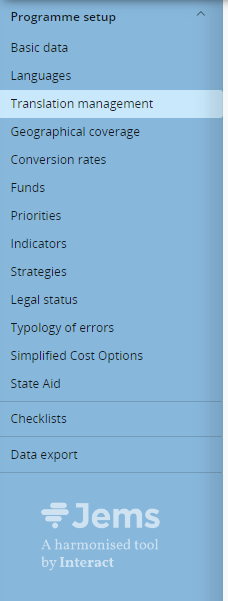
Translation management is located in the Programme setup section.

To access Translation management, make sure you have a relevant user role - Programme (Edit)
External tools
It is recommended to install and use the tool Notepad++ to modify and compare translation files. If you have a restrictive environment please download the portable version.
Structure
Translation management consists of two parts.
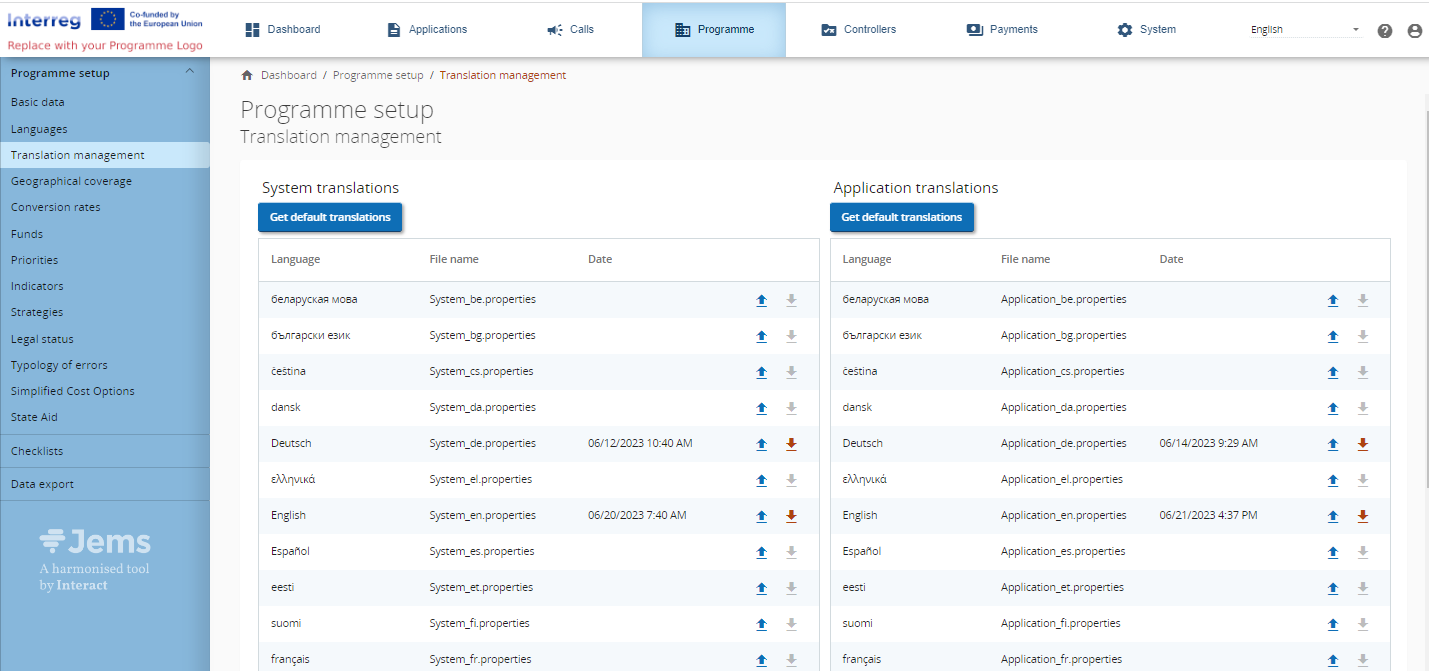
System translations - containing the translations for menu items, buttons, notifications, system items
Application translations - containing the translations for the application form (Sections A/B/C/D/E, headings, titles, description of application form fields)
Each part of the translation management has its own translation file.
System translations do not contain items of the programme setup such as funds, names of priorities, indicators and SCO, State Aid schemes, legal statuses. Translations for these items can be entered directly in the system user interface!
Translation files
Translation files are in simple plain text file format.
The structure of the file is represented by key-value entries related to each translatable element in the system.
Comments in the translation files help to identify which section in the system a translation text relates to.
Translation file example:
#B - Project partners
project.application.form.section.part.b=B - Project partners
#partner tab navigation
partner.tab.identity=Identity
partner.tab.contact=Contact
partner.tab.motivation=Motivation
partner.tab.address=Address
partner.tab.budget=Budget
partner.tab.coFinancing=Co-financing
Please do not change translation keys, this can lead to inconsistent system behavior’s.
Advanced usage:
New Lines - Application translation file supports “\n” which makes a new line - This is not supported in System translation files.
(New lines are only accepted on certain elements in the application form: headlines, questions, descriptions. It will not work for other UI elements e.g. button labels.)URLs - Info-bubbles can be clickable and forward the internet browser into a specific URL with the syntax [[URL]], example:
location.title.infobubble.description=[[https://yourLink.com/example]] Test descriptionSpecial chars can also be used/found in translation files as follow examples:
\u201C “
\u201D ”
\u2013 –
\u2019 ’
\u20AC €
Entry | Type | Description |
|---|---|---|
| Comment | Comments identifying sections |
| Key-value element | Translation key-value. Value after “=“ can be translated and adapted by programmes. |
Translation management steps
Follow the steps below to translate system text and application form text according to the system languages supported by your programme.
In the example below, EN, DE, RU are supported system languages in Jems.
Login
Login as a user with the privilege to edit the Programme setup.
Step 1
Open Translation management in the Programme setup section

Step 2
Get the default translation files for System translations and Application translations by clicking the related buttons:

This will trigger the download of the default translation files containing all the translation keys supported by your specific version of Jems.
Default translation files are in English language.
File name | Description |
|---|---|
System_en.properties | System translations |
Application_en.properties | Application translations |
Step 1 and step 2 need to be done only once per Jems release.
Please save the default translation files in a separate distinctive file location, you will need them for future releases.
Step 3
Change the translation file names according to the supported language.
In our example we will use German.
Open System_en.properties in an external Editor and change the values of the translation keys.
Example of translated file in DE:CODE#* ##authentication #* #authentication labels authentication.email.label=Email authentication.password.label=Passwort authentication.login.title.label=Bitte loggen Sie sich einOpen Application_en.properties in an external Editor and change the values of the translation keys.
Example of translated file in DE:CODE#B - Project partners project.application.form.section.part.b=B - Projektpartner #partner tab navigation partner.tab.identity=Identität partner.tab.contact=Kontakt partner.tab.motivation=Motivation partner.tab.address=Adresse partner.tab.budget=Budget partner.tab.coFinancing=Kofinanzierung
After the translation is done, please save the files with the predefined filename indicating the expected language. (Save as action in Notepad++ Crtl+Alt+S)
For German (DE), the filename has to be:
File name | Description |
|---|---|
System_de.properties | System translations |
Application_de.properties | Application translations |
Note: Please make sure the language abbreviation in the file name refers to the correct language.
Step 4
After all translations are done, the translation files can be uploaded via Translation management.
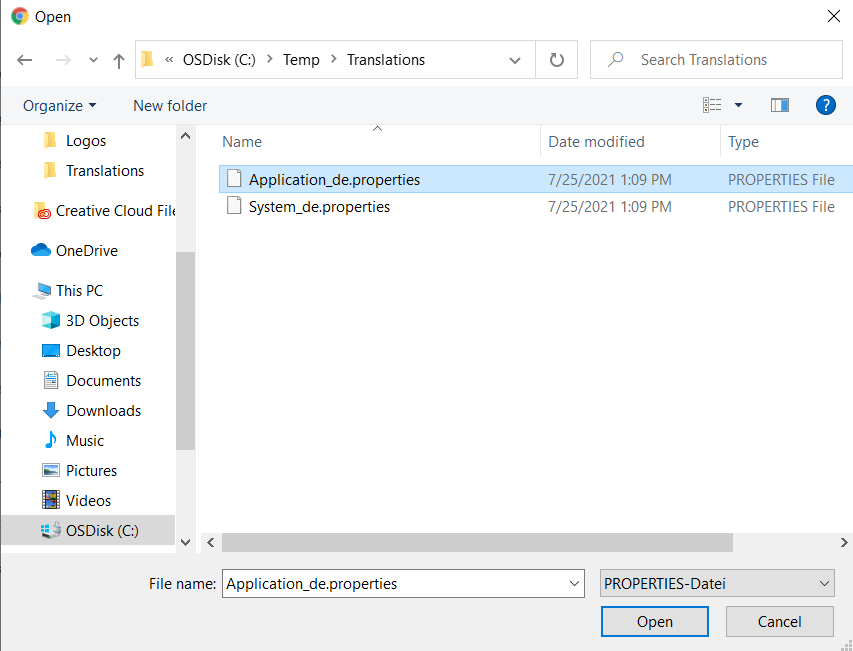
In the translation management, scroll to the entry for the language which has been translated. By clicking on the upload button of the System translations section and Application translations section, you can upload the translation files.

The "open file dialogue” will be opened

A timestamp indicates the latest upload.
Once a translation file for a language is uploaded, the option to download (the latest uploaded file) will become active.

Missing or corrupted translation keys will be replaced with their equivalent in default = English language!
Hint: If your programme supports English language, you can also change the default English texts by editing and uploading the English translation files of System translations or Application translations.
Step 3 and step 4 can be repeated as often as required to add or modify translations.
Certain file managers (e.g. Windows file explorer) may be configured to not display the file extension name. Having the wrong file extension name or two file extension names may cause the upload to fail due to a wrong file name.
After upload of translation files
Please note that all users logged in while a translation file is uploaded will have to log out and log in again in order to see the latest changes in translations.
For the user who initiates the upload of translation files, changes will take effect immediately.
Make sure you see all changes by refreshing the pages (Ctrl+R)!
In order to see translations in the system, the respective languages have to be enabled as system languages. The setup and configuration of Jems system languages is described in Programme setup | System-Languages.
Update of translation files
Translation files are likely to change with each new Jems release. The technical release notes will provide related information.
Please see the update instructions in the next chapter.
