Pre-submission check add-on
Introduction
Every Programme may need to apply programme specific requirements to the Jems service. Jems provides an option to enhance the service according to your specific requirements.
Add-on approach allows to enhance specific part of the system without change of the core logic. This preserves the benefit of receiving regular updated of the core application.
Jems comes with Add-ons included in the installation package. Further development of add-ons is recommended to every programme who wants to customize the system to individual needs.
Purpose
Create an extension for core application functionalities which are represented but not limited by:
Pre-submission checks
Every programme receives sample of Jems Add-on which contains example of implementation with communication interface.
Build Instructions
Prerequisites
It is required to install the packages listed below for a successful build of the Jems Add-on
OpenJDK Runtime Environment 11 |  |
IntelliJ IDEA Community edition |  |
Please follow the steps below to prepare Add-on solution for development.
Step 1 - Open solution
After successful installation of required packages, we are ready to open sample of Add-on project.
Press Ctrl+O or click on File → Open via menu to open sample of Add-on.
Specify folder where sample of addon is located.
Add-on project will be opened as on screenshot below.
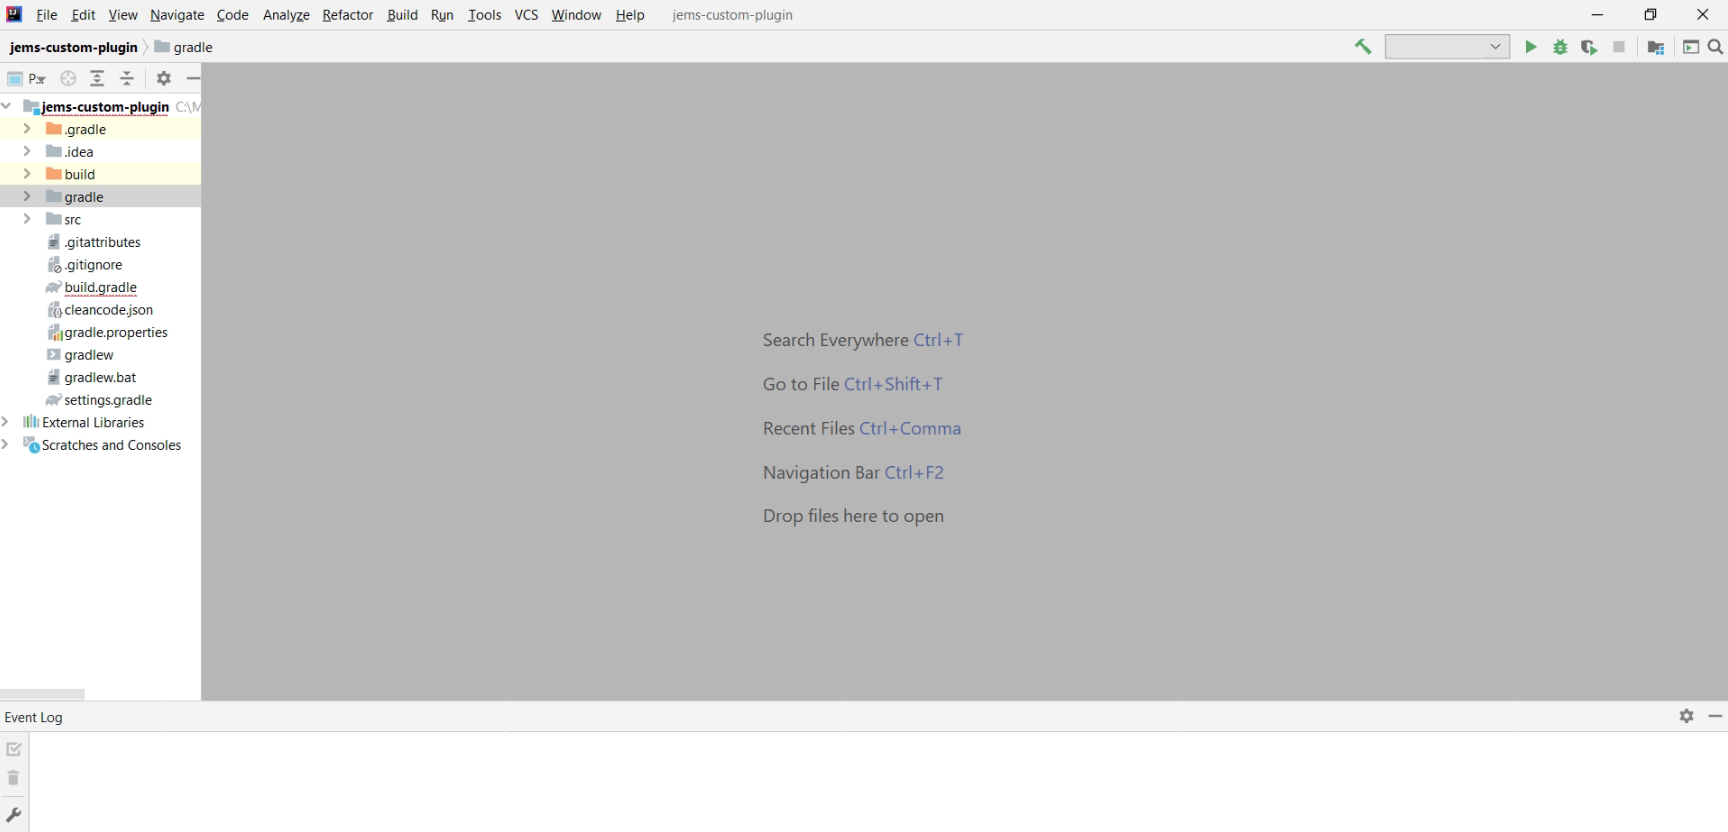
Step 2 - Run/Debug configuration
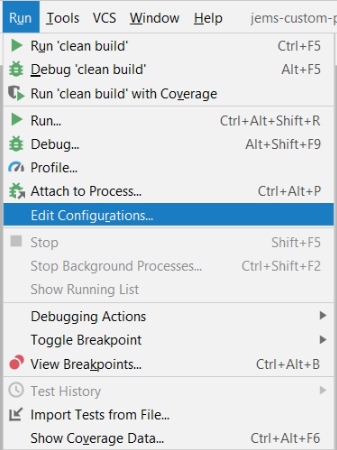
Click Run → Edit configurations to specify Gradle Run/Debug configuration
In opened window press Add Gradle Run/Debug configuration and setup configuration of Gradle project as on screenshot below
Tasks:
clean build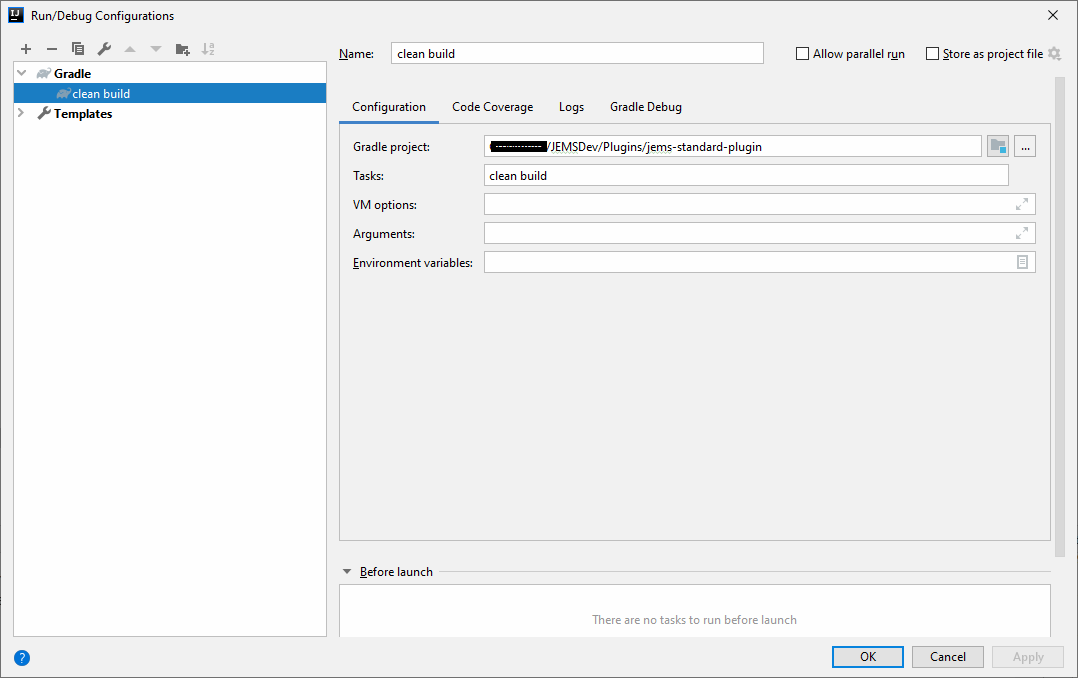
Step 3 - Update indexes
As soon as Add-on project opened for the first time, IDE starts updates of the indexes
Ensure that there are no background tasks running
Indexes should be updated
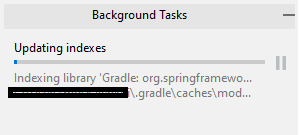
Update of indexes could take several minutes
After successful background tasks execution, you will see collection of Extended Libraries in Project overview
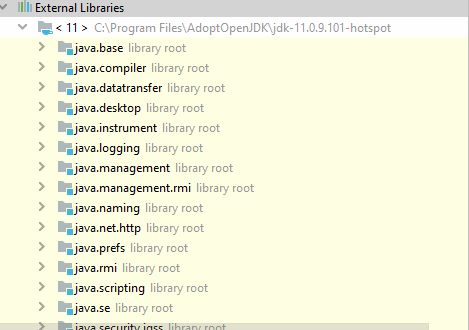
Step 4 - First build
After successful indexing IDE should look like on the screenshot below
Development IDE overview
- External libraries are loaded
- Gradle build configuration is available
- Gradle tasks are visible
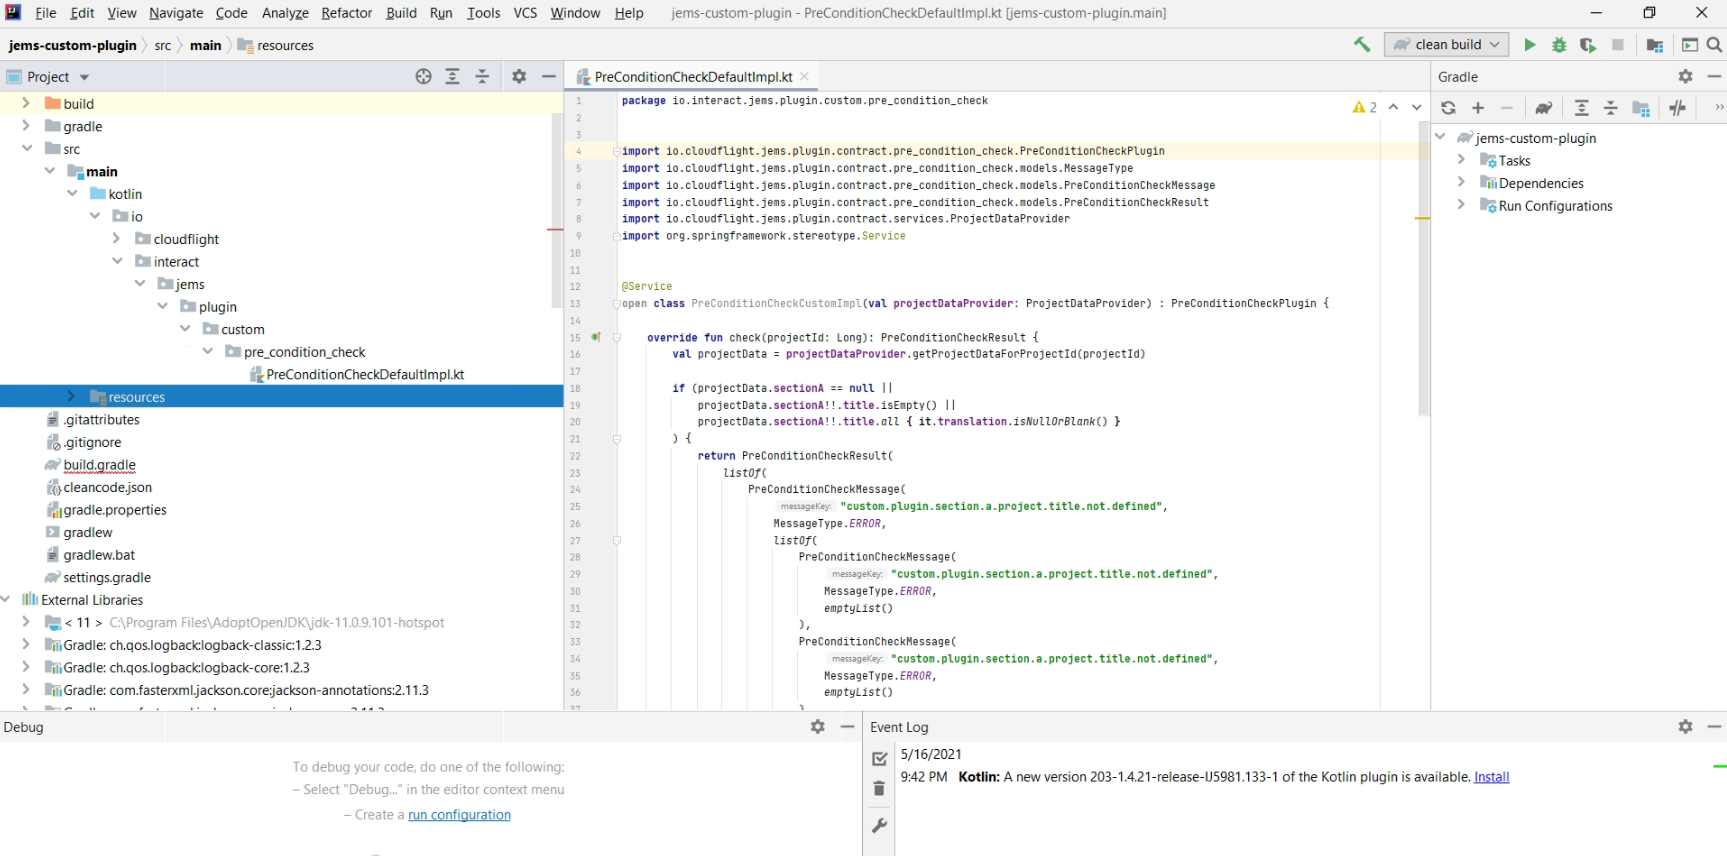
Press on Green arrow

Or press Crtl+F5 to initiate first build of project Add-on
If build succeed, it should be show protocol below
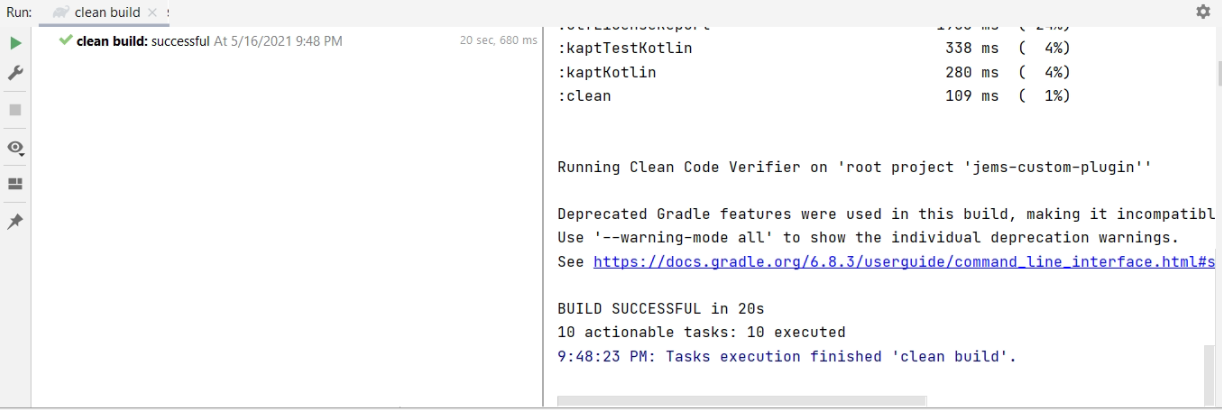
If there are some issues with build, please ensure that you followed steps above and check the error message.
Step 5 - Find build results
After build has been successfully done, you can find JAR file in build folder.
By default if is created in the same folder where Solution is located.
Folder where solution is located\build\libs\jems-standard-plugin-XX.XX.XX-SNAPSHOT.jar
Development Instructions
Note: Project structure and below development instructions are related to Pre-submission check Add-on!
Project structure
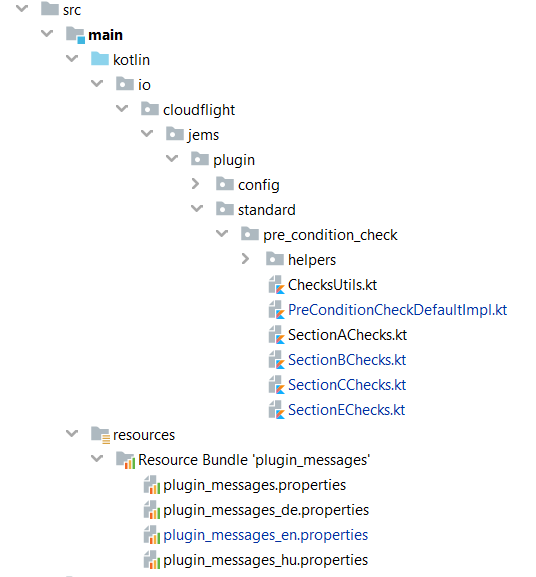
Each section in project structure implements verification related to specific Application form part:
SectionAChecks
SectionBChecks
SectionCChecks
SectionEChecks
CustomPluginConfig - Contains definition of Add-on
“io.interact.jems.plugin“ should be unique for every Add-on
This part of project should not be removed from existing name space io.cloudflight.jems.plugin.config
package io.cloudflight.jems.plugin.config

import org.springframework.context.annotation.ComponentScan
import org.springframework.context.annotation.Configuration

@Configuration
@ComponentScan(basePackages = ["io.interact.jems.plugin"])
open class CustomPluginConfig
PreConditionCheckDefaultImpl - Contains entry point for Pre-submission check Add-on
Name space of Add-on implementation could be specified by programme, current implementation is io.interact.jems.plugin.custom.pre_condition_check
PreConditionCheckCustomImpl class name is quite generic. Class should implement PreConditionCheckPlugin Interface.
package io.interact.jems.plugin.custom.pre_condition_check

import io.cloudflight.jems.plugin.contract.pre_condition_check.PreConditionCheckPlugin
import io.cloudflight.jems.plugin.contract.pre_condition_check.models.MessageType
import io.cloudflight.jems.plugin.contract.pre_condition_check.models.PreConditionCheckMessage
import io.cloudflight.jems.plugin.contract.pre_condition_check.models.PreConditionCheckResult
import io.cloudflight.jems.plugin.contract.services.ProjectDataProvider
import org.springframework.stereotype.Service

@Service
open class PreConditionCheckCustomImpl(val projectDataProvider: ProjectDataProvider) : PreConditionCheckPlugin {
.....
}
Interface implementation
Pre-submission check should implement Interface structure mentioned below:
interface PreConditionCheckPlugin : JemsPlugin {

    fun check(projectId: Long): PreConditionCheckResult
}
Pre-submission check input value is projectId: Long
Pre-submission check response structure, contains the list of messages and definition of Pre-submission check, isSubmissionAllowed (true/false)
data class PreConditionCheckResult(
    val messages: List<PreConditionCheckMessage>,
    val isSubmissionAllowed: Boolean
)
Pre-submission check response message structure.
messageKey - reference to translation message, see description below
messageType - INFO, WARNING, ERROR depending on the message type, it is going to be shown specific icon in the response
subSectionMessages - list of child messages to be shown in response
data class PreConditionCheckMessage(
    val messageKey: String,
    val messageType: MessageType,
    val subSectionMessages: List<PreConditionCheckMessage>
)
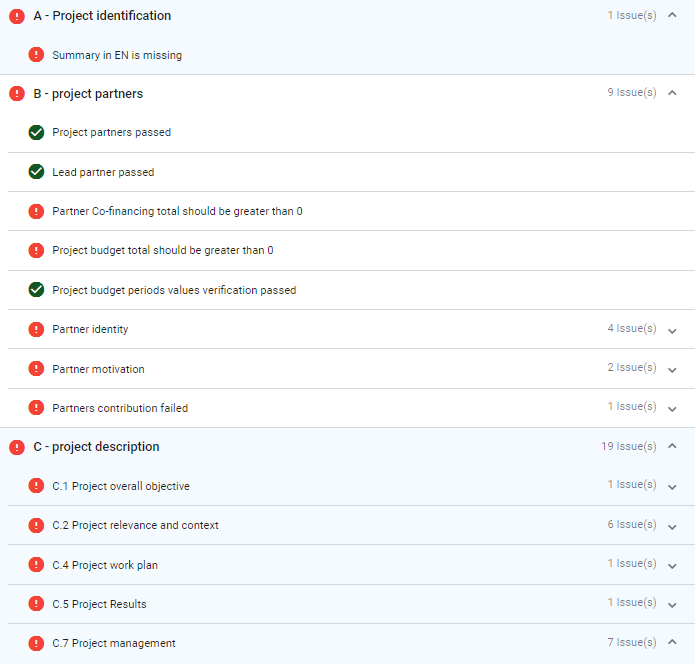
Response message produces the tree structure shown in the Jems application.
Translations implementation
Add-on messages and translations are located in project resources
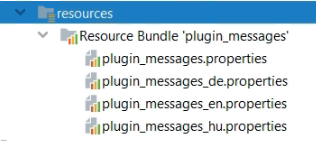
Translation properties contains list of messages with associated translation in specific language.
To add a additional language, you should add translation properties with definition of language (ru, es, etc)
custom.plugin.section.a.project.error=Section A verifications
custom.plugin.section.a.project.title.not.defined=Project title in section A is not defined
.......
Below an example how to use spefic translation reference:
new PreConditionCheckMessage
(
    "custom.plugin.section.a.project.error",
    MessageType.ERROR,
    emptyList()
)
Add-on usability
If Add-ons are to be used, the following startup parameter should be used
-Dloader.path=[Add-ons] for using the folder 'Add-ons' next to the jems-server as root to scan for Jems Add-ons
Further this section in the [application.yaml] specifies which paths are taken for their translation files. the following parameters are set by default:
spring:
   messages:
     basename: classpath:/messages, classpath:/plugin_messages
Since all translations for one language end up in the same file, add-on translation files as well as their translation keys need to use a specific unique add-on identifier!
If the main translation files need to be exchanged, instead of the classpath:/messages an own path should be used.
Add-on error cases
There are 3 error types supported by the system to inform end users regarding the state of Add-on.
Error | Description |
|---|---|
Plugin Error! | General error - you need to run Jems server in console mode to see the cause of the issue. Ex:  |
Plugin with key "{{pluginKey}}" was not found | Plugin does not implement expected interface |
Type of plugin with key "{{pluginKey}}" is not valid | Plugin was found but implementation does not follow expectation of the executed actuion. |
In all the cases it is recommended to run Jems server in console mode to get more details about the issue.
Repository
Add-on are included in Jems repository.
All types of add-ons located in jems-add-on folder
